In this blog post I’ll show you how to generate a CSR (Certificate Signing Request), export a PFX (Personal File Exchange) file and configure PowerApps to use your new SSL certificate.
By default, your PowerApps portal is already using Azure’s wildcard certificate that’s used on all Azure sites. But if you want to use a custom domain on your Portals site you will need a new SSL certificate for that domain.
In order to generate a SSL certificate your certificate authority is going to need you to create a CSR (Certificate Signing Request). There are a number of ways to generate a CSR file, but in this guide we are going to use IIS becasue, quite frankly, it’s the simplist.
This guide also applies to Dynamics 365 Portals
Install IIS
If you don’t have IIS installed follow these steps, otherwise skip this section.
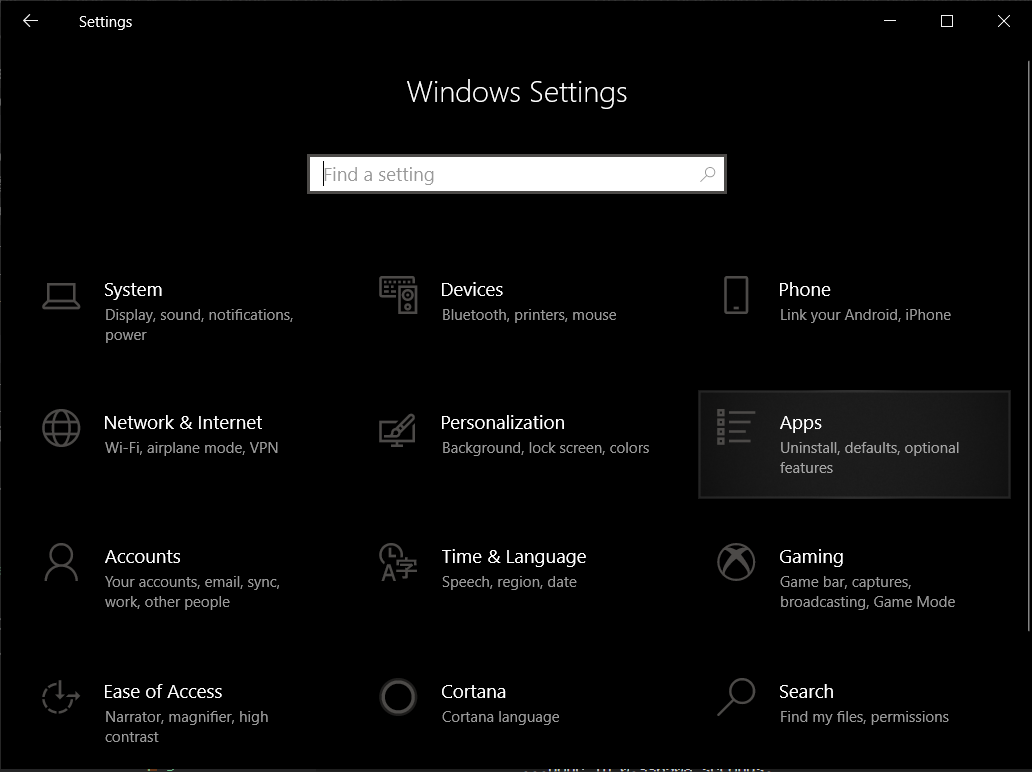
- Open Windows Settings and click on Apps.
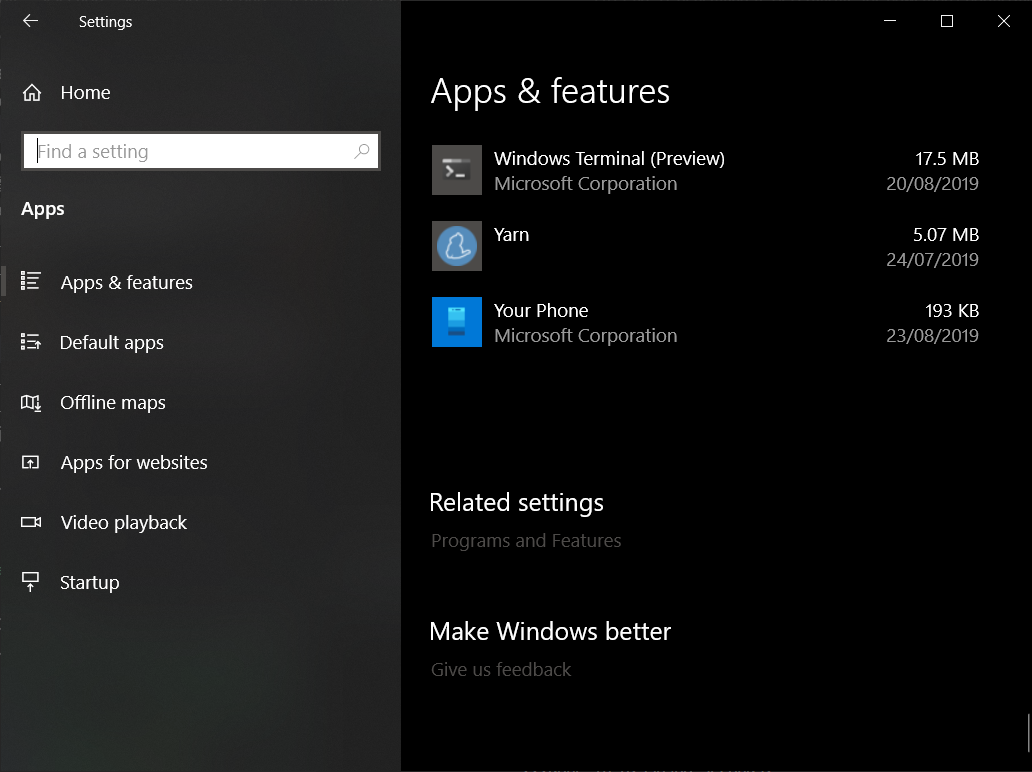
- Scroll all the way down to the Related settings section and click Programs and Features.
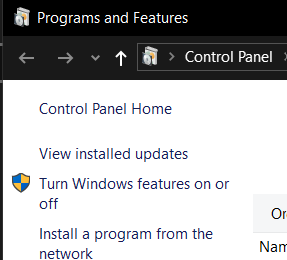
- From the Programs and Features control panel click Turn Windows features on or off.
- Expand Internet Information Services, then expand Web Management Tools and check IIS Management Console.
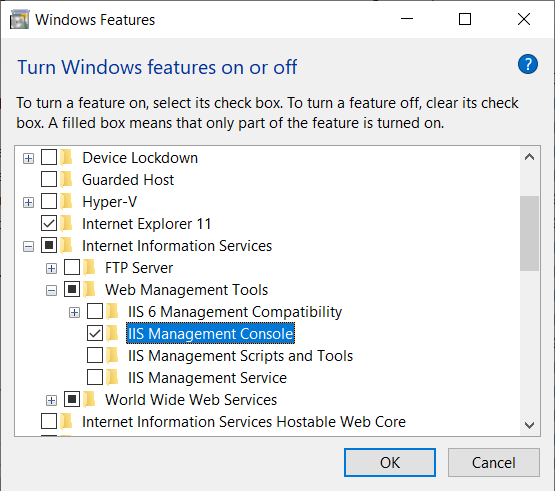
- Finally click OK.
It will take a few moments to install IIS. Once it’s complete you are ready to generate a CSR!
Generate a Certificate Signing Request
- Open IIS and double click Server Certificates.

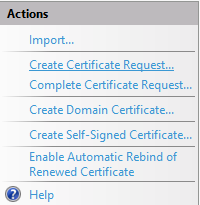
- From the Actions bar on the right, click Create Certificate Request….
- Enter the distinguished name properties and click Next.
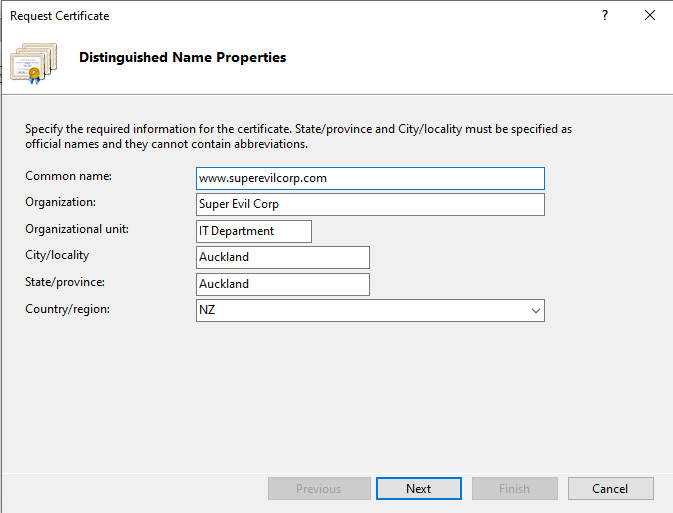
Common name should contain the custom domain of your portal. For example
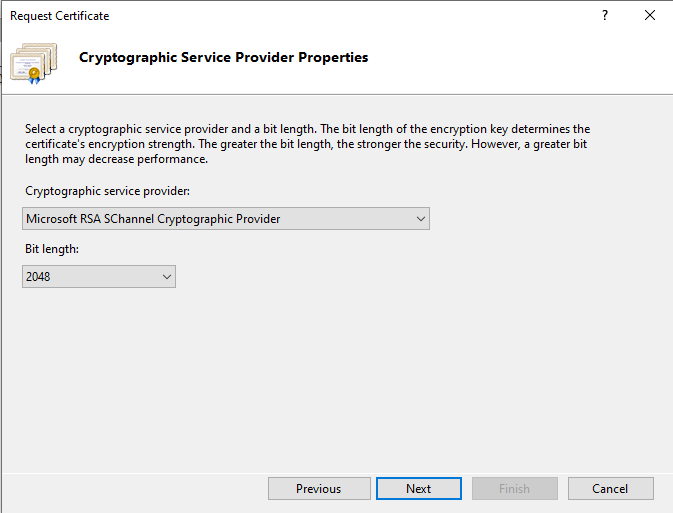
www.ryanjames.dev. - For the crypographic service provider properties, leave Cryptograpic service Provider as
Microsoft RSA Channel Cryptographic Provider, change Bit length to2048and click Next.
- Specify a file name with the
.csrextension and then click Finish.
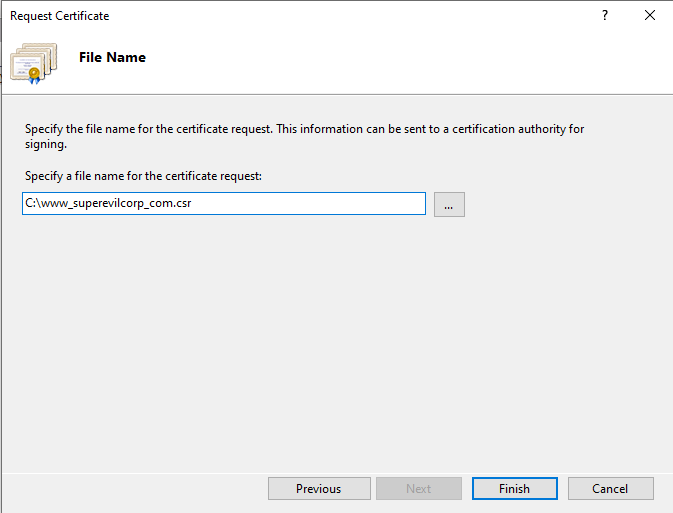
You should now have a CSR that you can submit to your certificate authority. You can validate that the details of the CSR are correct by running certutil -dump filename.csr in Command Prompt.
Complete the Certificate Request
Once your certificate authority has provided you with your new certificate, you will need to complete the request and export a PFX certificate file to be uploaded to the PowerApps Portal admin center.
- Open IIS and double click Server Certificates.

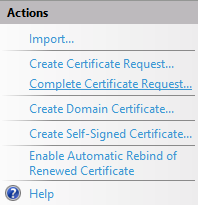
- From the Actions bar on the right, click Complete Certificate Request….
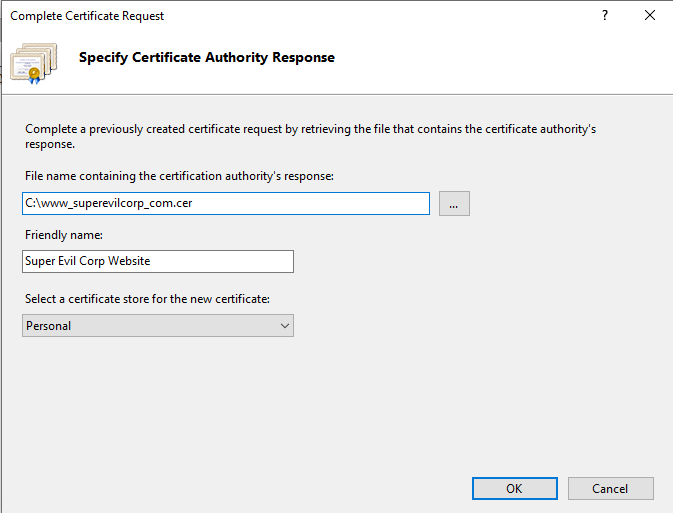
- Select the certificate file you recieved from your certificate authority, give it a friendly name and leave the certifiacte store as
Personal. Click OK.
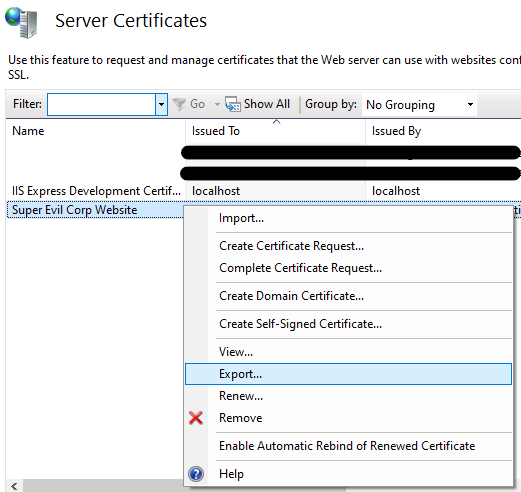
You may need to change the extention of the certificate file to
.cerif you provided with a.crtfile. - Right click the new certificate record in the Server Certificates list can click Export…
- Specify a location where you want the
.pfxfile to be exported to and give the certificate a strong password. Click OK.
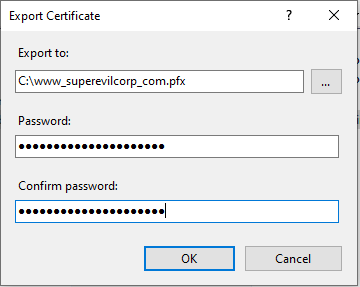
Remember this password. You will need it when uploading your certificate to the PowerApps Portals admin center.
Upload the certificate to PowerApps Portal admin center
Almost there! Next we have left to do is upload the .pfx file to our portal through the PowerApps Portals admin center.
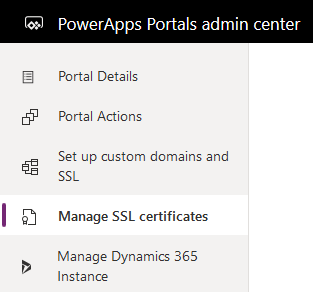
- Browse to the PowerApps Portals admin center for your portal and click Manage SSL certificates.
- Click Add new.

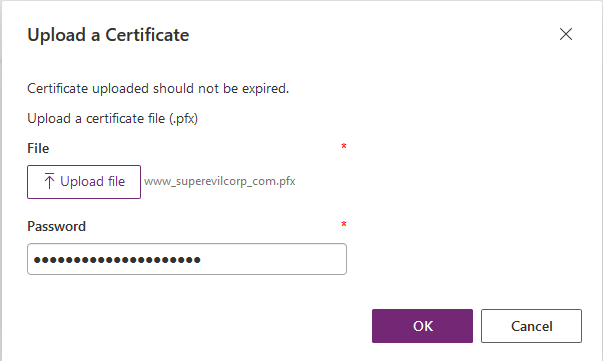
- Click the Upload file button, select the
.pfxfile we exported earlier, enter the password we created and click OK.
Create a SSL Binding
Finally! The last section, I promise! We can now create a SSL binding between the certificate and the portal hostname.
- From the PowerApps Portals admin center click Set up custom domians and SSL.
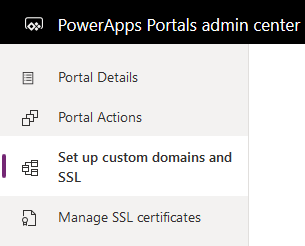
- Under the SSL Bindings section click Add new.

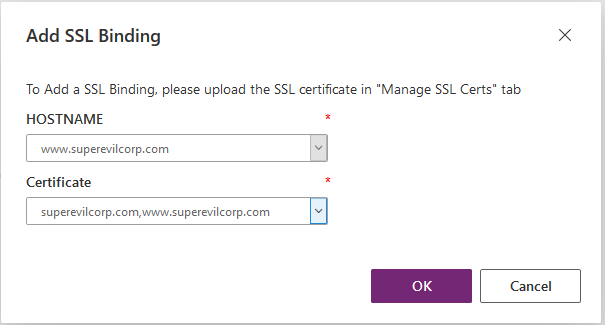
- Specify the HOSTNAME and the Certificate you want to bind and click OK.
Easy as!
Sorted! You should now be able to browse to your PowerApps portal using your custom domian with yournew certificate in place.
